
Street photography in Amsterdam: where should you stand?
You're standing outside Central Station as travelers pass by. There's plenty happening, but where do you focus your attention?
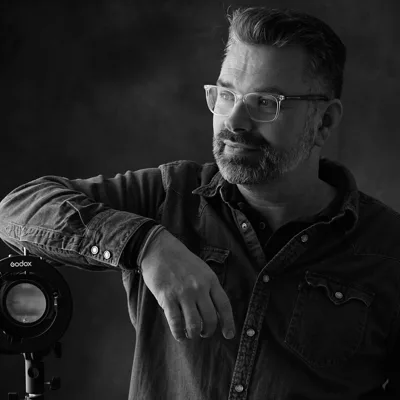
Michiel Heijmans, one of the editors
Updated on October 13, 2026
Central Station: let people pass by
For street photography in Amsterdam, you can start at Central Station. It's a transportation hub on the IJ, with plenty of travelers arriving and leaving. That immediately gives you something to practice with: people moving through your photo.
Choose your frame first. What appears at the edges? How much space do you want to leave around someone? Deciding that in advance means you have fewer decisions to make at once with each passerby.
Then stay in the same spot for a while. Watch where people enter your frame and when they overlap. Maybe one person works better than a group. Maybe it only gets interesting when two people walk far enough apart. You can explore that from the same spot.
For people walking, a shutter speed of 1/500 is a useful starting point. It lets you focus on the moment without movement immediately causing blur.
Having lots of people in the frame doesn't automatically make a photo better. Sometimes you get home and all you see is how busy it was. So try making a photo where you can clearly point to what catches your eye first. In a place like this, that means making choices.
Along the IJ and by ferry to NDSM-werf
IJkade is the quay along the IJ. By the water, you can work with space and lines. Try starting with a wide frame and see how small a person can be before they carry too little weight in your photo.
Pay attention to how the elements are arranged. A person at the edge makes for a different photo than someone in the center of the frame. Try both from the same spot. That lets you see what the placement does without changing the entire background at the same time.
From Central Station, you can take the ferry across the IJ to NDSM-werf, a former shipyard in Amsterdam-Noord. You can use the crossing to continue photographing somewhere else. You don't have to turn it into a full-day itinerary.
For example, take one question with you: how much of the surroundings does a person need in my photo? Explore that at IJkade and again at NDSM-werf. Decide what you can use when you get there. That way, you can later compare photos based on a photographic choice, rather than just where they were taken.
Zeedijk and another photographer's perspective
Ed van der Elsken photographed on Zeedijk. He also photographed Amsterdam's jazz cafés, nightlife and harbor. Koen Wessing documented the changing city. Their work is part of the Dutch tradition of street photography.
That's useful to know as you walk here. You're looking at a place where earlier photographers focused their attention on everyday life. What you find there is something you'll have to see for yourself.
A useful exercise on Zeedijk is to choose one thing to focus on before you start. The distance between people, for example. Notice when that distance makes a difference in your photo: are people separate, do they overlap, or does an interesting arrangement emerge?
You don't have to recreate someone else's photo. An earlier photographer's work can make you curious. Then you're there with your own camera, at a different moment. That's already quite a difference.
Waterlooplein: making choices in a market square
Waterlooplein is a square with a market. Here, you can practice choosing what to include in your photo. Start small: look around for a background that makes people easy to distinguish.
Then look at the edges of your frame. Is something entering that pulls your attention away? A small step to the side can be enough to separate elements. Try that before moving on.
Also try taking a few photos from the same spot, pressing the shutter at different moments. Compare people's positions against the background. A head that blends into something behind it can be hard to make out. A little more separation between those elements makes it clearer what you photographed.
Look at those photos side by side. Which has the most pleasing arrangement? Where does your eye linger? Try to keep your answer specific. 'This one feels better' is a start, but you learn more if you can point out why.
The tunnel under the Rijksmuseum: looking at the transition
The tunnel under the Rijksmuseum is a passage for cyclists and pedestrians beneath the museum building. Here, you can work with the light outside against the darkness inside.
First, choose which part of that transition you want to show. The opening looks different from a darker spot than it does when you're standing closer to the light. Move a little and see what changes in your frame.
Then watch the moment when someone walks or cycles through that light. Where does the person become clearly visible? When do they blend into the dark area instead? You can wait for someone to reach the spot you've already chosen.
Check your exposure, too. Do you mainly want to preserve detail in the bright area, or do you want to see what's happening inside? Take a test shot and adjust your setting to suit what you want to show.
You can judge how strong the contrast is when you're there. The article on photographing in harsh light explains more about working with pronounced differences in light. A passage is a useful place to practice with people's positions in relation to the light.
Vondelpark: adjusting your pace
Vondelpark is a large city park. A park is quieter than a station and calls for a different pace. If you've just been photographing at Central Station, it helps to give yourself a little time to adjust.
Here, you can practice watching the same frame for longer. Decide how much of the surroundings you want to include, then wait to see whether a moment comes along that fits. Maybe your first position turns out to be less useful than you thought. Then you change it.
Try not to fill every empty space right away. Space around someone can be part of your photo. See whether your subject still stands out enough and whether the rest of the frame contributes anything.
For example, decide to stay in one chosen spot for ten minutes. That's no guarantee of a good photo. It does give you time to look beyond your first impression. You don't have to head somewhere else right away.
What are you allowed to photograph?
In the Netherlands, you can generally photograph whatever you want in public spaces. When you publish photos, portrait rights come into play. Taking a photo and then sharing it are two separate decisions.
That distinction also matters during an afternoon of photography in Amsterdam. Being able to take a photo doesn't answer the question of whether you can publish it.
The explanation of photography and portrait rights goes into more detail. It provides general information to help you understand what to consider. You decide where your own boundaries lie.
Keep your walk smaller
You can put all the places mentioned on a list. For an afternoon of photography, choosing one or two is fine, too. That leaves you time to try something and take another look if your first attempt doesn't produce much.
Choose a keyword in advance, such as 'distance.' Let that word guide your attention. At the station, you can watch the space between travelers. Along the IJ, you can explore how a person relates to the space around them.
Keep the assignment simple enough to remember as you walk. A whole sheet of requirements soon starts to feel like homework. One word gives you something to return to when you notice you're taking photos without a clear focus.
At home, look at a small selection side by side. Which photos fit your keyword? Is there a photo you hadn't imagined beforehand? Also write down what you'd like to try on your next walk. Waiting a little longer before pressing the shutter, for example, or leaving more space on one side of your subject.
Working from a keyword or theme is also the approach used in Michiel Heijmans' conceptual street photography workshop. It takes place in Amsterdam, among other locations, from 10:30 a.m. to 2:00 p.m., with a maximum of five participants. You'll walk about 2 to 3 kilometers, and the book Straatfotobijbel is included. Current dates are listed on the Amsterdam workshop page.
link.artikel_kop
Questions about Street photography in Amsterdam: where should you stand?
Where can you start with street photography in Amsterdam?
Central Station is a useful starting point if you want to practice with people moving through your frame. Choose a spot and let arriving and departing travelers pass by.
How do you get from Central Station to NDSM-werf?
You can reach NDSM-werf from Central Station by ferry across the IJ. It's a former shipyard in Amsterdam-Noord.
Do you need to visit lots of places on a photo walk?
One or two places are enough for focused practice. Staying in the same spot longer makes it easier to compare the effects of your position and the moment you press the shutter.
5 essential street photography tips
Sign up for Michiel’s newsletter and get his free e-book with practical tips and favorite street photos. First, confirm your email address using the link in the email.
About Michiel Heijmans
Portret- en straatfotograaf. Boeken: Straatfotobijbel (Photofacts Publishing), The Observer (Uitgeverij KOMMA), De Wet van de Straat (met mr. Charlotte Meindersma). Columns voor Photofacts, voorheen voor Focus Magazine. Expert Perfecte Plaatje 2025. Lezingen voor CameraNu en fotoclubs. Podcast 30…
View Michiel Heijmans’s profile