
Street photography in Utrecht: looking between the station and the canal
You walk from Central Station into Hoog Catharijne as travelers arrive and depart. You can follow the crowd, but stopping for a moment gives you time to see what's happening in front of your camera.
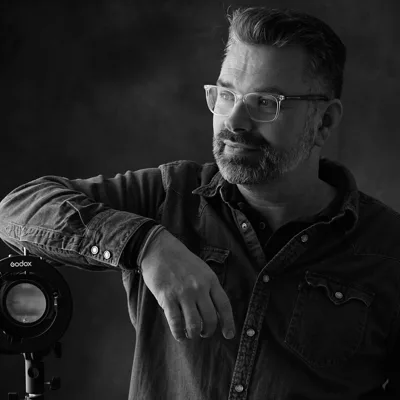
Michiel Heijmans, one of the editors
Updated on October 13, 2026
Start at Central Station
Central Station is a large train station with plenty of travelers arriving and departing. You can start your street photography in Utrecht here with a simple exercise: choose your frame before you choose who to photograph.
First, spend some time watching how people move through that frame. Where do they enter your photo? At what point are they separate from one another? When does it get so crowded that you no longer know where to look? You don't need an elaborate plan. A few minutes in the same spot will give you something to work with.
Then try capturing different moments within the same frame. Someone at the edge of the photo creates a different balance than someone in the middle. Two people might overlap or leave space between them.
Review a few photos as you go. Pay particular attention to when you pressed the shutter. Maybe you were consistently a little early, while your position worked just fine. That gives you something specific to change in the next photo. It's more useful than immediately moving on because there must be a better spot somewhere.
Hoog Catharijne: working with the transition
Hoog Catharijne is an indoor shopping mall directly connected to Central Station. That connection creates a steady flow of people. You can practice keeping your composition fixed while the people in your photo keep changing.
For example, take a photo with just a few people in the frame, then wait until it gets more crowded. Compare what happens. More people means more relationships between them, but also more overlap. A busy photo can work. You just need to be able to point out what you saw in it.
Moving between indoors and outdoors also means dealing with artificial light and daylight. Check your exposure again when you move into a different setting. A setting that worked a moment ago might no longer work a few steps later.
If you find yourself mostly following people, try choosing a background in advance. That leaves you with one less decision to make in the moment. You can then focus on where people are in the photo. It frees up a little space in your head. There's usually enough going on in there while you're taking photos.
The Oudegracht has two levels
The Oudegracht runs through the city center and has wharves and wharf cellars at water level, below street level. This lets you work with two levels in your composition.
Start by looking at how your position affects the photo. From street level, you see the relationship between people and their surroundings differently than you do from water level. You can include both levels in one photo, or choose a tighter frame in which one level defines the image.
Including two levels doesn't make a composition on its own. Look at how much space each part gets. Does the foreground take up a lot of room without adding anything? Is someone so close to another shape in the frame that you can barely make them out? A small change in position can solve that.
As an exercise, make two versions of the same scene, if the situation allows it. Give street level more space in one photo and water level more space in the other. Compare them later to see where your eye goes first.
You don't have to show the entire canal to make a street photo there. A small section can be enough. The rest was there too, but it doesn't all have to come home with you.
A second attempt at the Nieuwegracht
The Nieuwegracht is also in the city center and has wharves at water level. You can keep practicing the relationship between the two levels here. A second location is especially useful if you bring a question from your earlier photos.
Perhaps you noticed at the Oudegracht that you kept showing a lot of the surroundings, leaving people small in the frame. Try deliberately changing that balance here. Or keep more distance if your earlier photos showed little of the surroundings.
Try to change one thing at a time. If you move closer, tilt your frame and choose a different moment all at once, it becomes hard to see which choice made the difference.
Comparing photos doesn't have to become a graded homework assignment. Two photos side by side are enough to help you identify what you want to try next time. 'I like this one better' is a start. 'Here, that person stands out more clearly from the background' gives you something to work with.
You don't have to visit every spot
Besides Central Station, Hoog Catharijne, the Oudegracht and the Nieuwegracht, you can also consider the Kloostertuin. You don't have to visit all five. Choose based on what you want to practice and how much time you want to spend on it.
If you want to work on timing, you can spend a long time with a single frame. If you want to explore how height affects your composition, give yourself time for that. A list of locations is useful when you're preparing. While you're taking photos, that same list can leave you thinking mostly about the next stop.
For example, decide that you'll try a few different photos from one position first. Then decide whether to move on. That gives a place a chance to offer something beyond your first impression.
You can also work with a single keyword, such as 'distance.' Look at how the space between people appears in your photos. The word helps you choose what to pay attention to.
Indoors, outdoors and changing light
The light you find partly determines the photos you can make. At each new location, start by looking at where the light and dark areas are. Then decide which part matters to your photo and check whether your exposure suits it.
In harsh light, you can practice working with the boundary between light and shadow. Decide in advance where you want someone in the frame. Then wait for a situation where that position works. Check the background too: a bright area can draw more attention than the subject you had in mind.
If it rains, you can adapt your exercise to what you see at that moment. You don't have to stick to the photos you had planned. You can find practical advice for those conditions in photographing in the rain.
When switching between artificial light and daylight, also compare how colors appear in your photos. Ideally, look at a few consecutive photos. That way, you can see whether a difference comes from the surroundings or a setting you changed.
What's allowed where you are?
In the Netherlands, you can generally photograph whatever you want in public spaces. Portrait rights come into play when you publish a photo. Those are two separate questions, even if you take and share the photo during the same walk.
Not every place you can walk into is a public space. An indoor shopping mall is often managed by an owner or merchants' association that can set its own rules. That distinction is relevant at Hoog Catharijne. You'll need to check which rules apply there.
This is general information. The explanation of photography and portrait rights goes into more detail about the difference between taking a photo and publishing it. It helps you consider that question separately from your choices about position, light and timing.
Continuing with a theme
After your walk, choose a few photos to look at side by side. Look for a choice that keeps coming up. Maybe you often leave a lot of space between people, or you like working with different levels in one photo.
Use that as an assignment for your next visit. Try making that choice deliberately. It gives you a specific reason to return to the same place, even if you've photographed there before.
Michiel Heijmans's conceptual street photography workshop takes place in Utrecht, among other locations. You use a keyword or theme as a filter. The workshop runs from 10:30 a.m. to 2:00 p.m., has a maximum of five participants, and involves walking about 2 to 3 kilometers. The book Straatfotobijbel is included. Current dates are listed in the schedule on the Utrecht workshop page.
You can use a theme like this when practicing on your own too. Bring one question from your own photos on your next walk. See what the same place offers when you're looking for something different.
link.artikel_kop
Questions about Street photography in Utrecht: looking between the station and the canal
Where can you start with street photography in Utrecht?
Central Station and Hoog Catharijne, which is directly connected to it, offer a steady flow of people for practicing timing. With their wharves at water level, the Oudegracht and Nieuwegracht give you opportunities to use different levels in your composition.
Are you allowed to take photos in Hoog Catharijne?
An indoor shopping mall is often managed by an owner or merchants' association that can set its own rules. Check which rules apply when you're there. Being able to walk into a place doesn't automatically make it a public space.
Is there a street photography workshop in Utrecht?
Michiel Heijmans's conceptual street photography workshop takes place in Utrecht, among other locations. You work with a keyword or theme in a group of no more than five participants, and the book Straatfotobijbel is included. Current dates are listed in the workshop schedule.
5 essential street photography tips
Sign up for Michiel’s newsletter and get his free e-book with practical tips and favorite street photos. First, confirm your email address using the link in the email.
About Michiel Heijmans
Portret- en straatfotograaf. Boeken: Straatfotobijbel (Photofacts Publishing), The Observer (Uitgeverij KOMMA), De Wet van de Straat (met mr. Charlotte Meindersma). Columns voor Photofacts, voorheen voor Focus Magazine. Expert Perfecte Plaatje 2025. Lezingen voor CameraNu en fotoclubs. Podcast 30…
View Michiel Heijmans’s profile