
Street photography in hard light
A white wall in full sun, a doorway that turns almost black, and someone walking between the two. Street photography in hard light starts with contrasts like these.
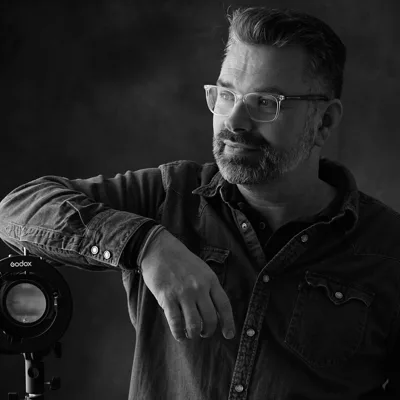
Michiel Heijmans, one of the editors
Updated on October 13, 2026
In the middle of the day
The sun is high. Hard shadows appear under eyes and noses, the sidewalk reflects the light, and a dark patch sits between two buildings. If you're looking for even exposure everywhere, you have some work to do.
You can also look at what those differences offer. A shadow divides a building's facade. A narrow strip of sunlight singles out one person on a busy street. Whatever happens farther away largely disappears into the dark.
That gives you something to work with. You don't have to wait for gentler light. In the middle of the day, you can make photos where the sharp transition between light and dark holds the composition together.
Look at a shadow as a shape
It's easy to see a shadow as a place with too little light. Try looking at its outline. A triangle on the ground, a dark band along a wall, a shape that takes up almost half your photo.
You can place that shape just as deliberately as a person. Shift your position a little and see how the balance changes. Maybe the photo becomes clearer when the dark area takes up more space. Maybe that hides something you need.
Pay attention to the edges of your frame, too. A small, bright patch of sidewalk can demand quite a bit of attention. That's fine, but check whether you want it there.
A simple composition helps you see these differences. Start with one wall, one shadow edge, and someone walking past, for example. The rest of the street can have its turn another time.
Expose for what you want to keep
When the difference between sun and shade is large, you can't always keep detail everywhere. Decide which part of the photo matters to you.
Do you want to preserve the texture of a bright facade, or detail in a face as it moves into the sun? Set your exposure accordingly. Check a test shot and use your camera's highlight warning or histogram if needed. It's hard to judge exposure from a bright screen alone in full sun.
If you're using an automatic exposure mode and those bright areas are getting too bright, you can adjust with negative exposure compensation. How much you need depends on the situation and the metering. There's no fixed negative setting for sunny days.
This also makes the shadows darker. That may be exactly what you're looking for. You don't need to see all the way into a doorway if it serves as a dark shape in your composition.
By the same token, not every tiny glint needs to contain detail. Focus on the bright areas that tell you something. You're making a photo, not keeping an inventory of every brightness level.
The exposure square
I think you should know the exposure triangle well: ISO, shutter speed, and aperture. And then be able to let it go. In an earlier column in Focus Magazine, I called it an exposure square. The fourth side is your own choice. You decide what exposure you want.
Hard light makes that idea very concrete. The same street can give you a bright photo with visible shadows, or a dark area with a single illuminated face. Your settings follow the photo you want to make.
It helps to decide beforehand what needs to remain visible. A face? The color of a jacket? Just the outline of a body? That answer makes choosing your settings much more straightforward. You can read more about the basics in my article on setting up your camera for street photography.
A silhouette needs space
If someone is standing in the shade against a bright background, you can render them as a silhouette. Expose for the background and see how dark the person becomes.
As facial details disappear, posture tells you more. A bowed head or an arm held away from the body can make the difference between a recognizable figure and an indistinct blob.
Pay attention to what's directly behind someone. If a dark head overlaps a dark doorframe, you lose the outline. A small shift in your position can create some separation.
The moment you catch within a movement matters, too. Two overlapping legs read differently than a stride where you can see them separately. When reviewing your photos, try looking just at those outlines.
Waiting by a patch of light
A narrow patch of light on the sidewalk can be enough reason to stop for a moment. Choose your framing and watch how people move through the light.
Where does the light fall on their face? When does it catch only a jacket or a hand? You can prefocus on the spot where you expect something to happen, or use focus tracking. Choose what suits the movement and the way you like to work.
Take a test shot before someone reaches the right spot. That lets you check the exposure and the edges of your composition in advance. You'll have enough to do when the moment comes.
Check occasionally that the light is still where you expect it to be. A composition that depends on a narrow strip of sunlight can change while you wait for the right passerby.
Color or black and white
Hard light can work well in black and white. Attention shifts to the arrangement of light and shadow. But a brightly colored jacket in a patch of light might be exactly what makes a photo work.
So look at what color contributes before removing it. When you convert to black and white, colors become shades of gray. Areas that look clearly different in color can end up looking more alike.
You can read more in my article on choosing between black and white and color. Both can work, including in hard light.
And when the light softens
You'll find the opposite when photographing in the rain: soft light, without the hard shadows of bright sunshine. You can look for reflections and people seeking shelter, for example.
In sunshine, you can start with something very simple: where does the light end? Follow that edge through your frame. Maybe it still needs someone walking through it. Maybe the shadow itself is enough.
Questions about Street photography in hard light
What settings should I use in bright sunshine?
Choose your shutter speed for the movement and your aperture for the depth of field you want. Adjust ISO accordingly and check that important bright areas retain detail. There is no single fixed combination.
Do I need to brighten dark shadows in editing?
You don't have to. Consider what it does for the photo. Sometimes you want to make something visible. Sometimes the shadow works precisely because you can see very little in it.
How do I avoid hard shadows on a face?
Look for a spot where the entire face stays in the shade if you want more even exposure. You can also choose the moment when the face turns toward the light.
5 essential street photography tips
Sign up for Michiel’s newsletter and get his free e-book with practical tips and favorite street photos. First, confirm your email address using the link in the email.
About Michiel Heijmans
Portret- en straatfotograaf. Boeken: Straatfotobijbel (Photofacts Publishing), The Observer (Uitgeverij KOMMA), De Wet van de Straat (met mr. Charlotte Meindersma). Columns voor Photofacts, voorheen voor Focus Magazine. Expert Perfecte Plaatje 2025. Lezingen voor CameraNu en fotoclubs. Podcast 30…
View Michiel Heijmans’s profile